Back to FAQ & Getting Started Index
Enabling Free SSL/TLS
- Important, please make sure your domain is pointing to your hosting here and fully active or the certificate authorization will fail.
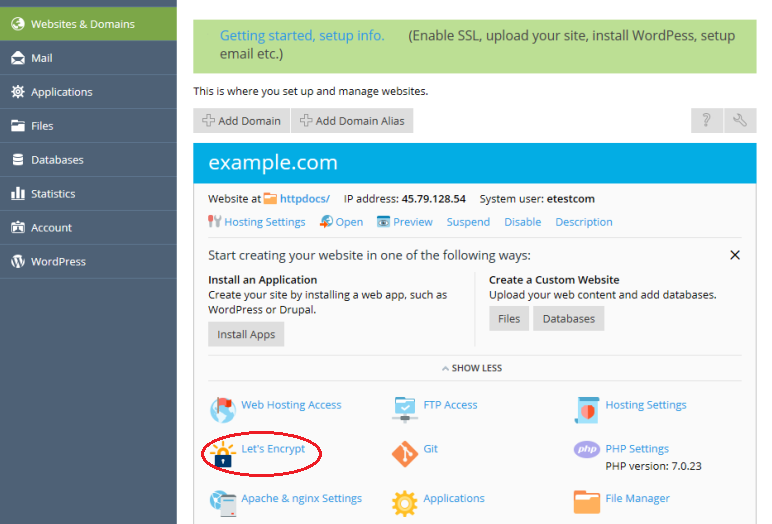
- Go to Websites & Domains > Click the Let's Encrypt icon under the domain you wish to enable SSL.

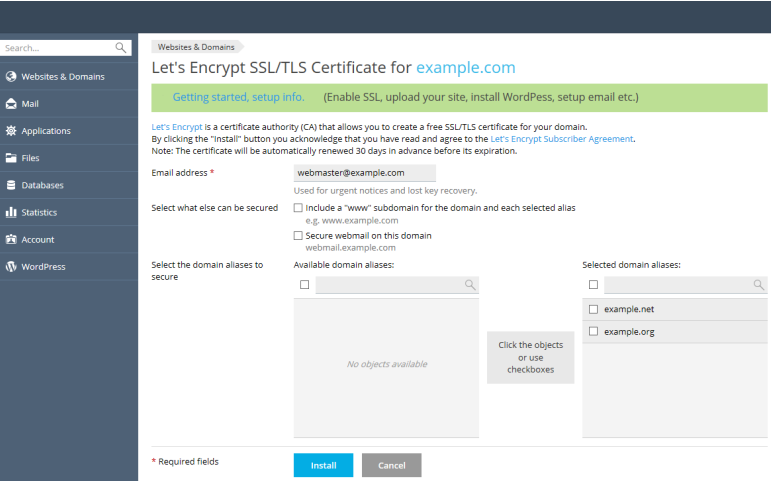
- Next, complete all applicable information. Impotant, domain aliases must resolve to your hosting here or the setup will fail.
- Click Install.
Please continue to the final step below that
enables the certificate for your sites hosting.

Final Step, Enable the SSL certificate
- Now that the certificate has been installed, you may use it to secure your site.
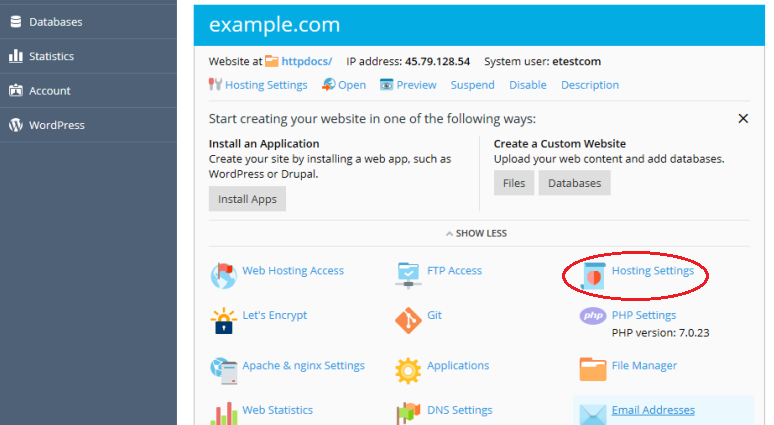
- Go to Websites & Domains and click Hosting Settings.

- Select the SSL/TLS support checkbox.
- Select the Let's Encrypt certificate you have just received from the Certificate menu.
- Click OK at the bottom and you are finished!

Back to the Index
