Contents
This guide helps when you are using more than one Contact Form in your Website.
Contact Form
1) Insert Field-Name , this Field-Name you will use in contact-form-id Textarea box of contact settings page.
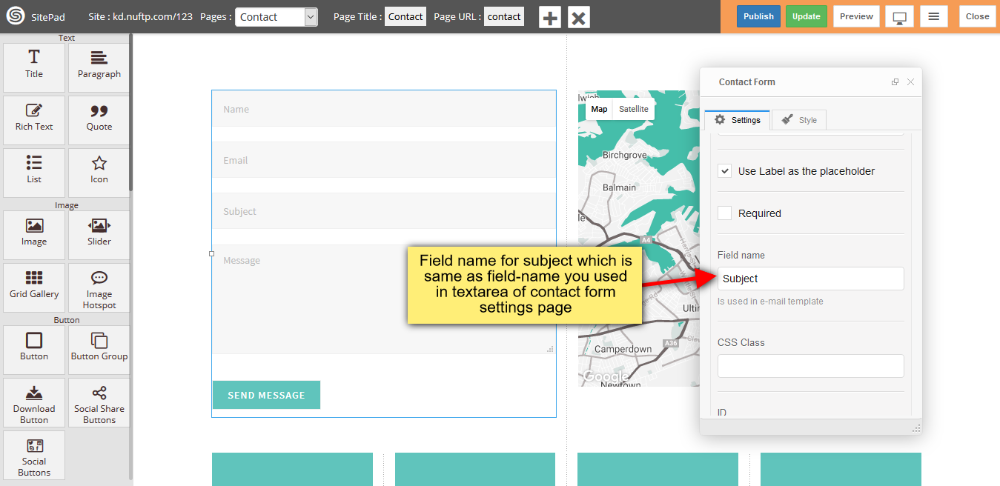
2) Insert Form Id , this Form Id you will use in contact-form-id Textbox box of contact settings page.

Contact Settings Page
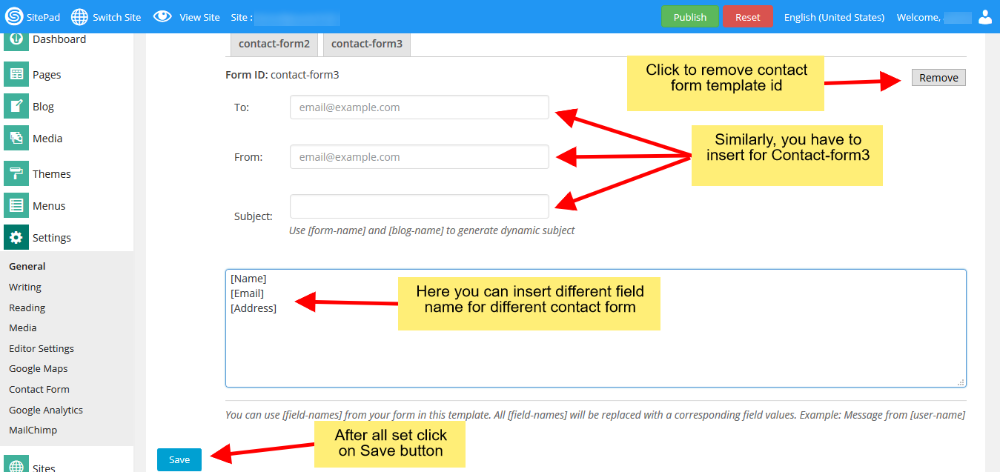
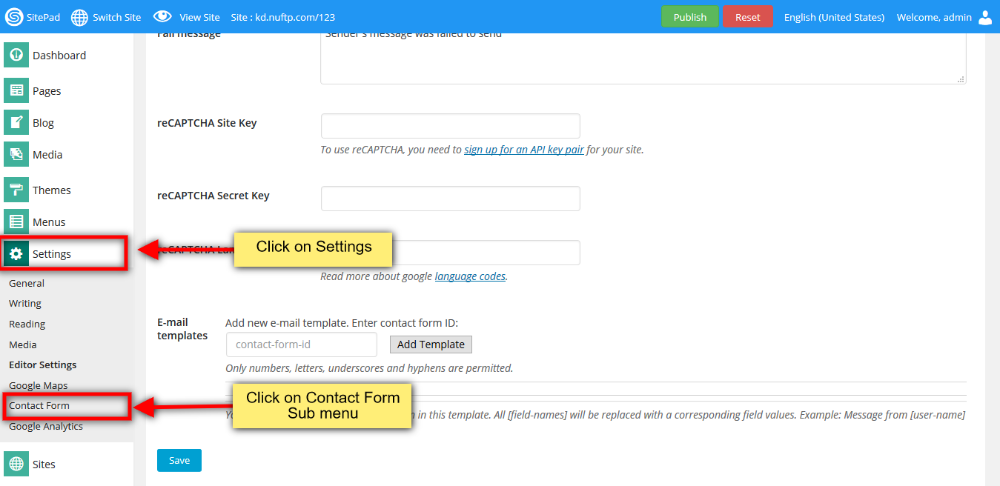
1) Go to SiteBuilder Settings Menu in that click on Contact Form submenu. You can see the image shown below.
2) Now insert contact-form id which you inserted in contact form when you designed. And click on Add Template button.
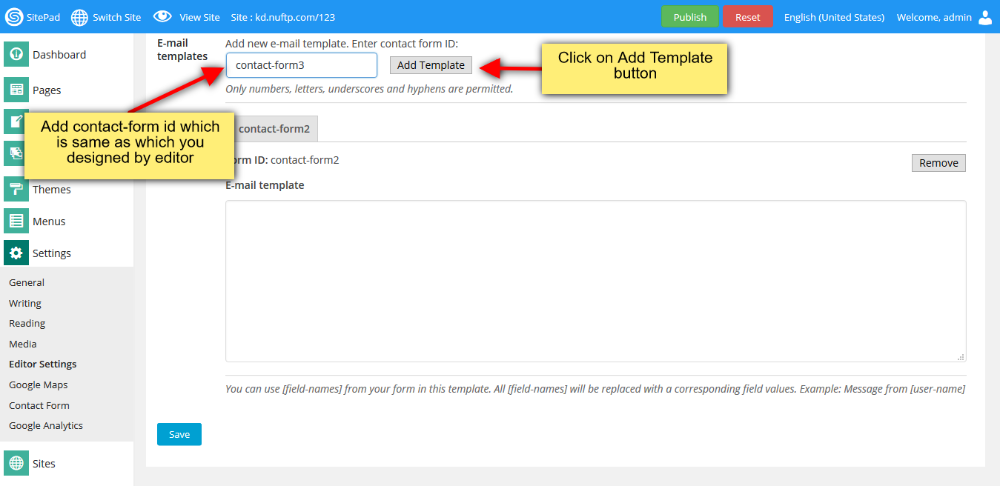
3) When you click on Add Template button and click on Save button then you will see image as shown below.
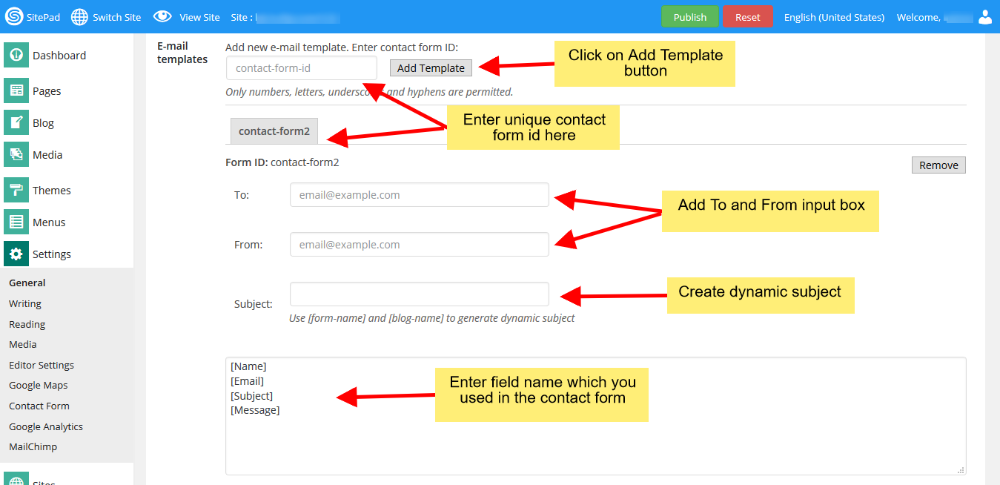
4) Enter Email address in To and From input box to a particular user for sending the details of a particular form. Textarea box you can see, in that you insert your Field-Name along with square bracket one-by-one. Click Remove button for removing the contact-form-id along-with all the details such as To, From, Subject and fieldname Textarea box. After all changes, click on Save button.