This guide will help you to Customize Contact Form.
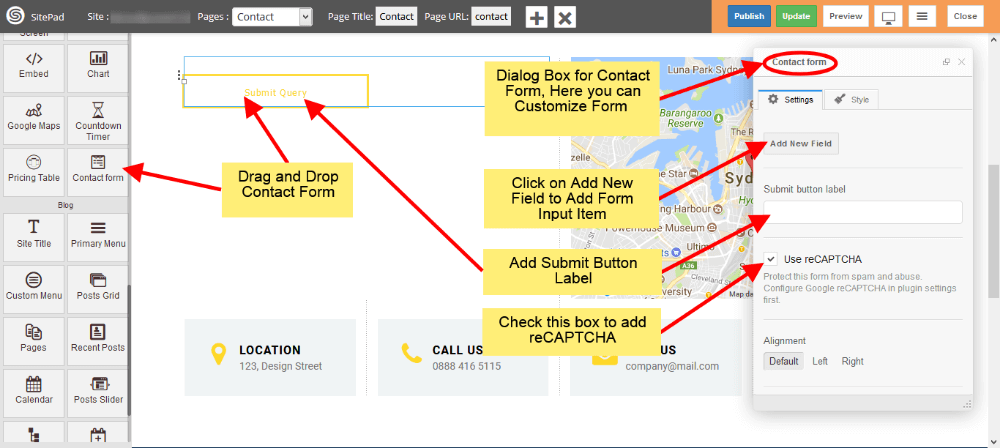
1) Drag and Drop Contact Form from left side Widget Panel or simply click on it if already present in page to open Dialog Box. Now in Dialog Box Click on Add New Field to add new input field to your Form. Enter Button label and check use reCAPTCHA box if you want to use it as shown image below. If you don’t know how to setup reCAPTCHA then follow this guide. Setup reCAPTCHA for Contact Form
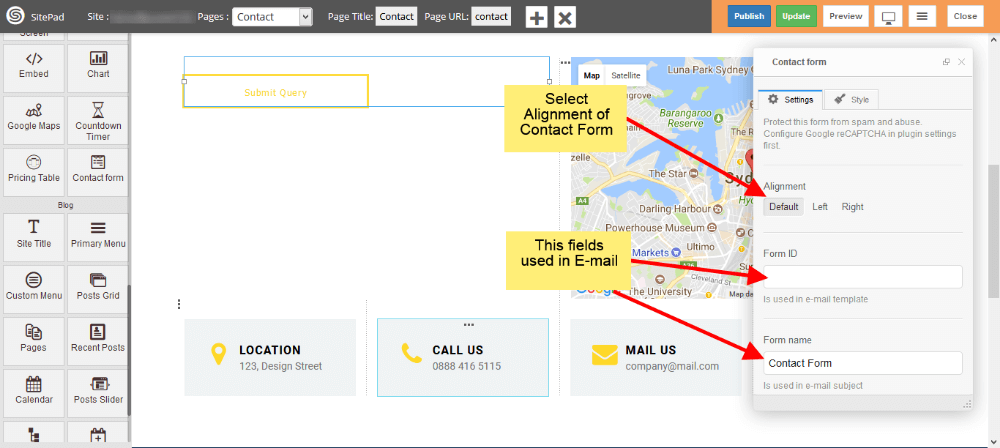
2) Now select Alignment for your Contact Form as per requirements. Form ID and Form Name this fields is used in E-mail template.
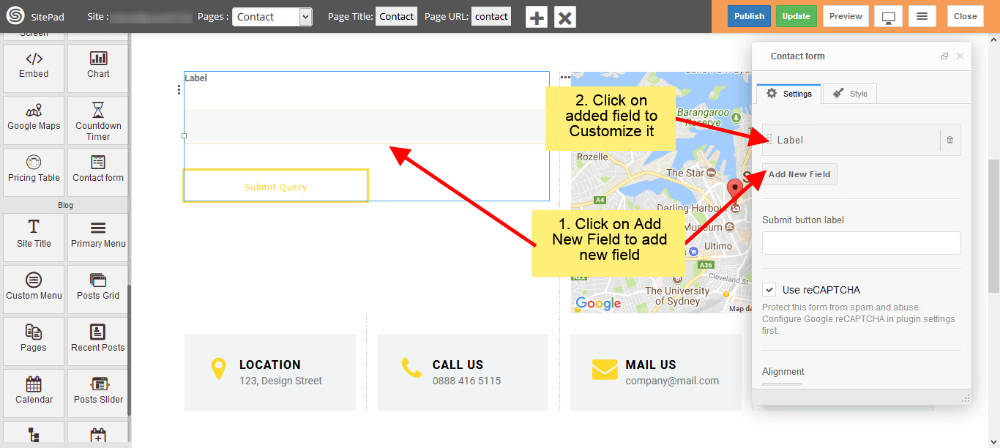
3) To add new fields just click on Add New Field. To customize newly added field just click on that particular field as shown in image below.
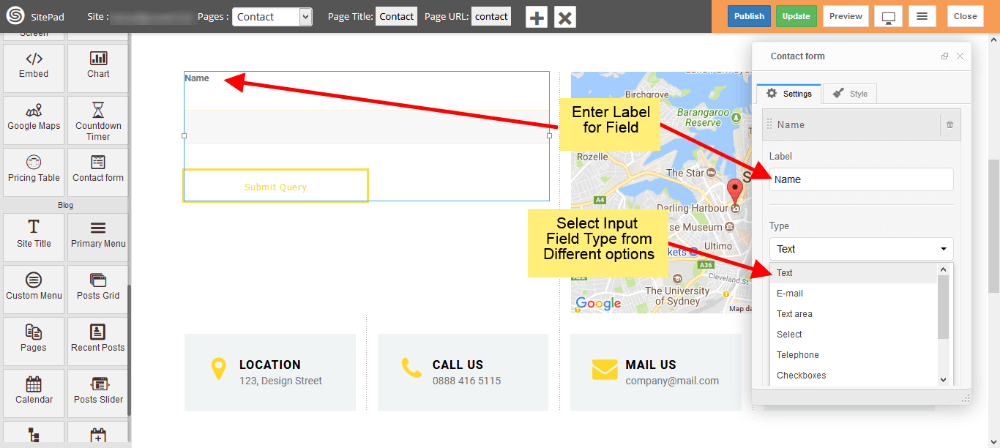
4) Now add Label for input field and select Type of that field. We have different input types like Text for names or surnames, E-mail for e-mail, Text area for messages etc.
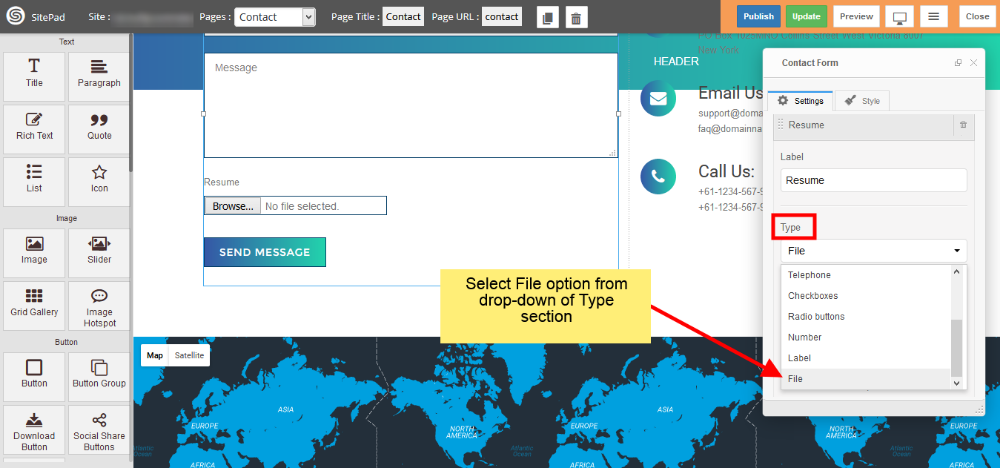
5) To add the file upload option in contact form, Please select File form Type section dropdown as shown in figure.
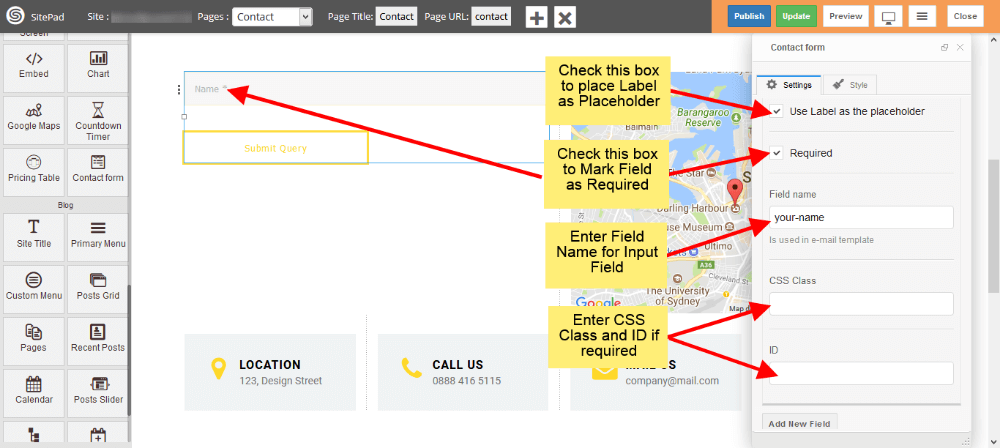
6) Check Use Label as Placeholder box to place your label as a Placeholder. If you want any field as a required field then check Required box. Enter CSS class and ID if you need them.
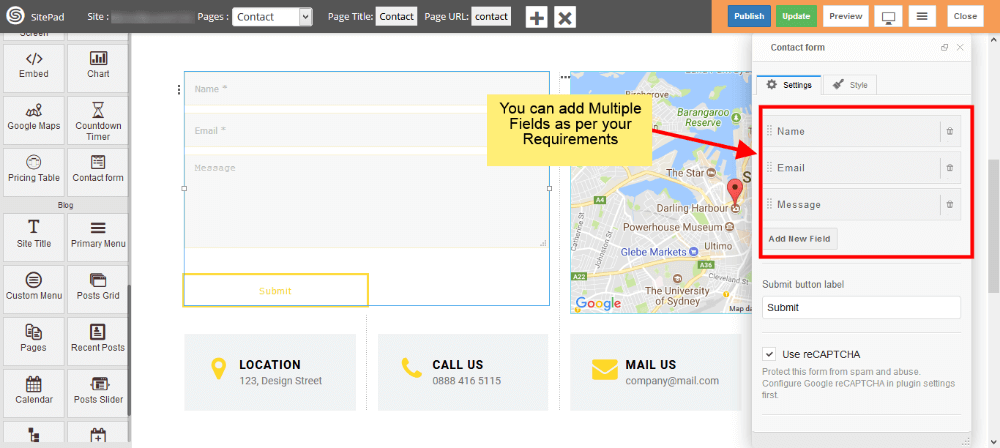
7) You can add multiple input fields into your Contact Form as shown image below.
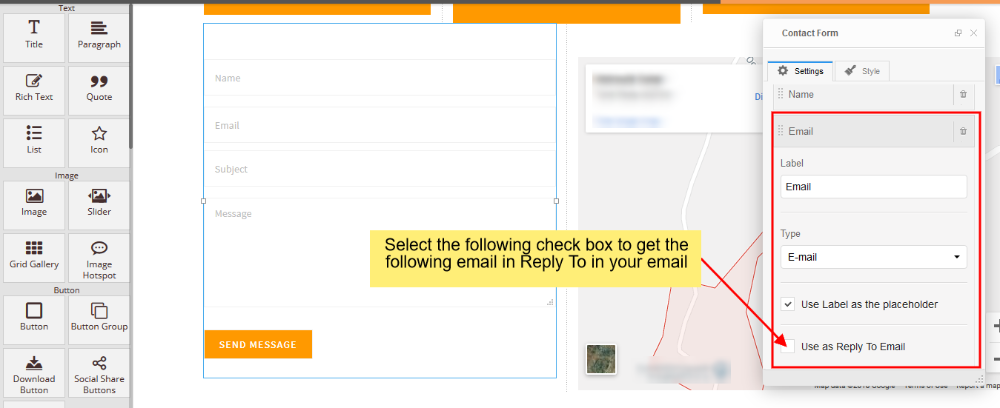
8) You can set Reply To as shown in the image below.
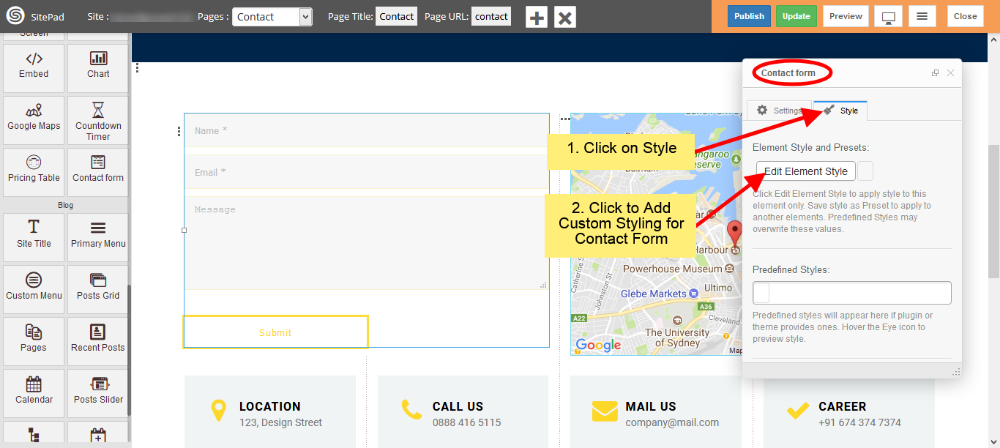
9) You can add Custom Style for Contact Form by following below image steps.
