Restoring Backups
If your data is corrupted or lost, you can restore it from a backup file. This topic explains how to restore data from a backup in Plesk.
When restoring from a backup file, you can restore all data contained in the backup, or select individual objects to be restored (for example, a particular site, all databases, and so on).
You can restore backups made in Plesk 8.6 and later. Starting with Plesk Onyx Preview 9, it is not possible to restore backups made in Plesk 11.x or older.
Note
When you restore objects from a backup, they overwrite and replace existing objects with the same name. You will not be prompted when an object being restored is about to overwrite an existing one. You will lose all changes to objects being restored that were made after the backup was created.
Restoring All Objects
To restore all objects from a backup:
Go to Websites & Domains > Backup Manager. Here you can see all backups stored both in the server storage and remote storages.
Click the backup you want to restore.
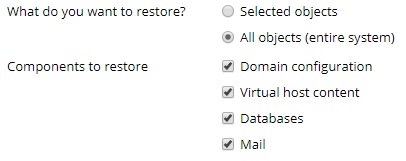
Under “What do you want to restore?” select the “All objects (entire system)” radio button.
Under “Components to restore” you can clear checkboxes next to classes of objects you do not want to restore. For example, when restoring a backup, if the “Databases” checkbox is selected, all databases and database users will be restored. If you clear the checkbox, none will be restored.
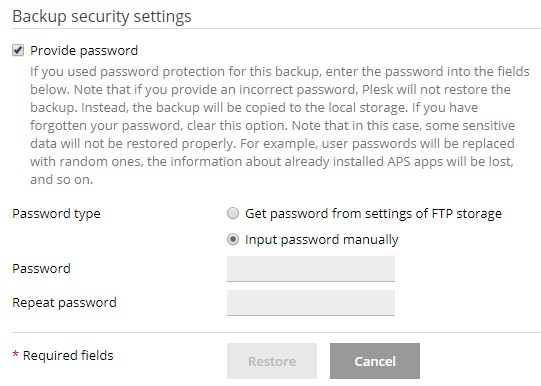
If you are restoring a backup secured with a password, select the “Get password from settings of Remote storage” radio button. Plesk will attempt to fetch the password automatically. If the password cannot be fetched automatically (for example, you are restoring a backup created on a different server), select the “Input password manually” radio button and type the password in the corresponding fields.
If the password cannot be fetched automatically and you do not know it, clear the “Provide password” checkbox. Plesk will restore the backup, but all passwords for restored objects (such as database users or mail accounts) will be generated randomly.
At this point, the backup is ready to be restored. There are a number of optional settings you can configure before restoring the backup:
- Select the “Suspend domains until the restoration is completed” checkbox if you want to ensure the validity of the restoration. Doing so will make your website unavailable until the restoration process is finished. Website visitors will see an error page with the 503 HTTP status code.
- Select the “When the restoration is completed, send a notification to” checkbox if you want to be notified via email when the restoration is finished. Make sure that the email address next to the checkbox is correct.
Click Restore to begin restoring from the backup.
You will be returned to the Websites & Domains > Backup Manager screen where you can see the backup being restored. The restoration process can take some time to finish, depending on the size of the content being restored. A notification will come up on this screen once the backup has been restored.
Restoring Individual Objects
You do not have to restore all configuration and content stored in a backup file. You can pick which objects to restore from the backup (for example, a single domain and all associated objects, a single mail account, or even just a single individual file).
To restore individual objects from a backup:
Go to Websites & Domains > Backup Manager. Here you can see all backups stored both in the server storage and remote storages.
Click the backup you want to restore.
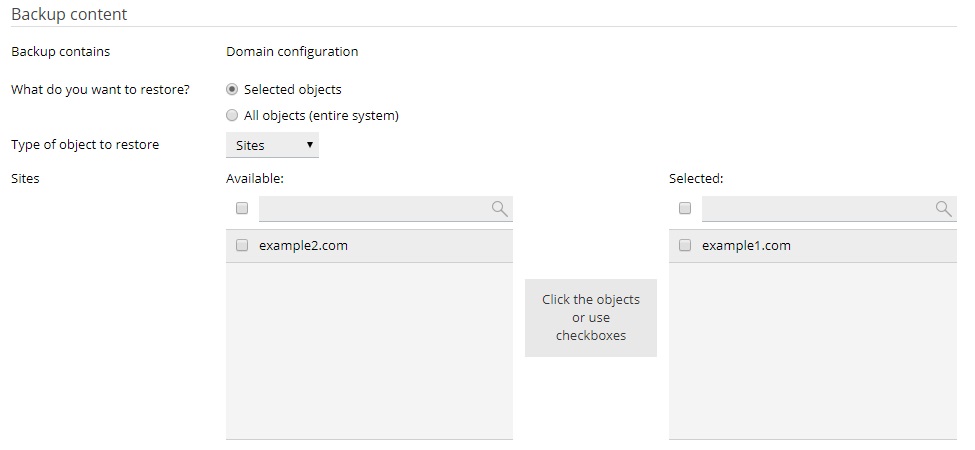
Under “What do you want to restore?” select the “Selected objects” radio button.
Under “Type of object to restore” select the type of objects you want to restore:
Mail account. Restore individual mail accounts.
Database. Restore individual databases.
Sites. Restore individual websites with all associated objects and content (mail accounts, databases, and so on).
DNS Zone. Restore DNS zone contents for individual domains.
Files of domains. Restore individual files.
If you want to restore objects of different types (for example, a single mail account and two databases), you would need to run the restoration twice, once for the databases, and once for the mail account.
Select which objects to restore. All available objects of the selected type are displayed in the “Available” column on the left. Click the objects you want to restore. Those objects will move to the “Selected” column.
If you selected “Files of domains” during the previous step, click Add files, select the file or files you want to restore, and then click OK.
You can select any number of files to restore.
Under “Restore”, select whether to restore only the configuration of the selected objects, or both the configuration and content.
For example, when restoring a database, selecting the former option will restore the database and the associated database users, but not the tables or the data. If the backup file only contains the configuration but not the content, this option is unavailable.
At this point, the backup is ready to be restored. There are a number of optional settings you can configure before restoring the backup:
- Select the “Suspend domains until the restoration is completed” checkbox if you want to ensure the validity of the restoration. Doing so will temporarily make your website unavailable. Until the restoration process is finished, visitors to your website will see an error page with the 503 HTTP status code.
- Select the “When the restoration is completed, send a notification to” checkbox if you want to be notified via email when the restoration is finished. Make sure that the email address next to the checkbox is correct.
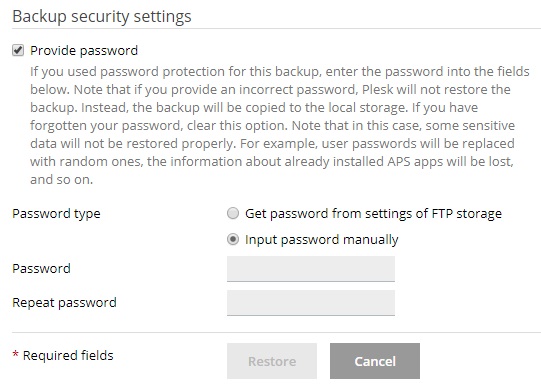
If you are restoring a backup secured with a password, Plesk prompts you to provide the password. We recommend selecting the “Get password from settings of Remote storage” radio button. This will automatically fetch a password specified in the Remote storage settings. If the password cannot be fetched automatically (for example, you are restoring the backup created on another server) select the “Input password manually radio button” and type in the password in the corresponding fields.
If the password cannot be fetched automatically and you have forgotten it, clear the Provide password checkbox. Plesk will restore the backup but certain data will not be recovered properly. For example, all passwords inside the backup database will be generated randomly.
Click Restore to begin restoring from the backup.
You will be returned to the Websites & Domains > Backup Manager screen where you can see the backup being restored. The restoration process can take some time to finish, depending on the size of content being restored. A notification will come up on this screen once the backup has been restored.


