In this tutorial, we will show you How to Add Categories to Blog Post.
For Adding Categories to your Blog Post you will need to access SiteBuilder Editor.
Go to SiteBuilder Editor
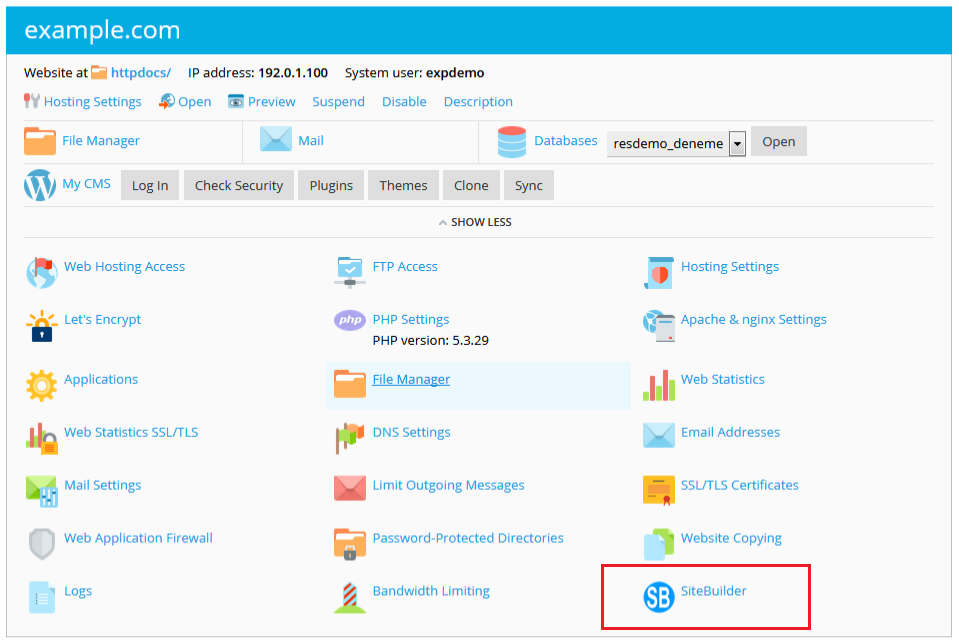
From your Control Panel click on SiteBuilder. You will be redirected to SiteBuilder Server.
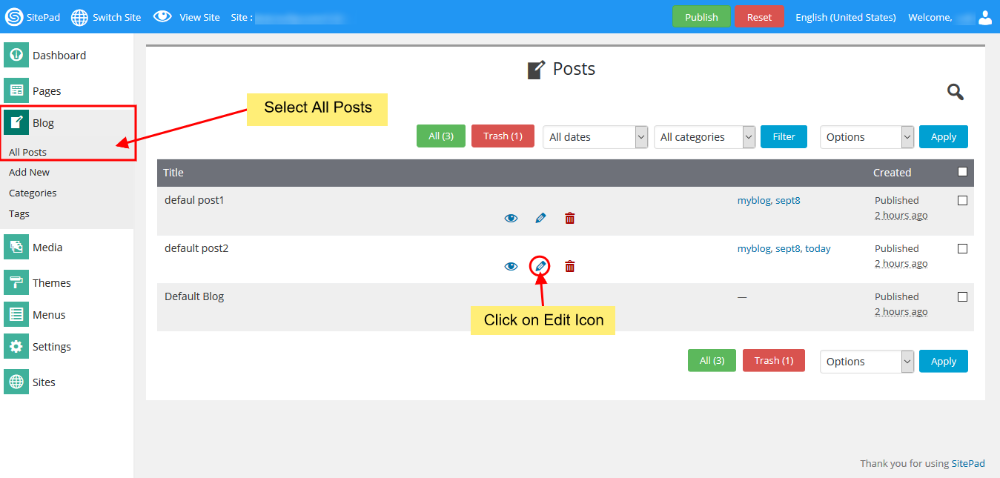
Once you are redirected to the Editor Server you will see Blog in the Main menu. Click on All Posts and then click on Edit Icon to edit the Post. You will be redirected to the Editor.
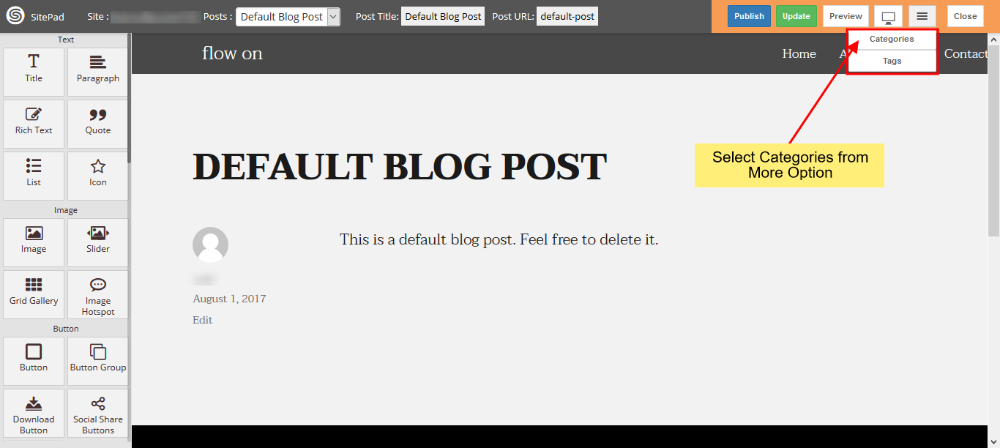
More Option and Categories Button
In Editor, you will need to hover the mouse on More then select Categories Button.
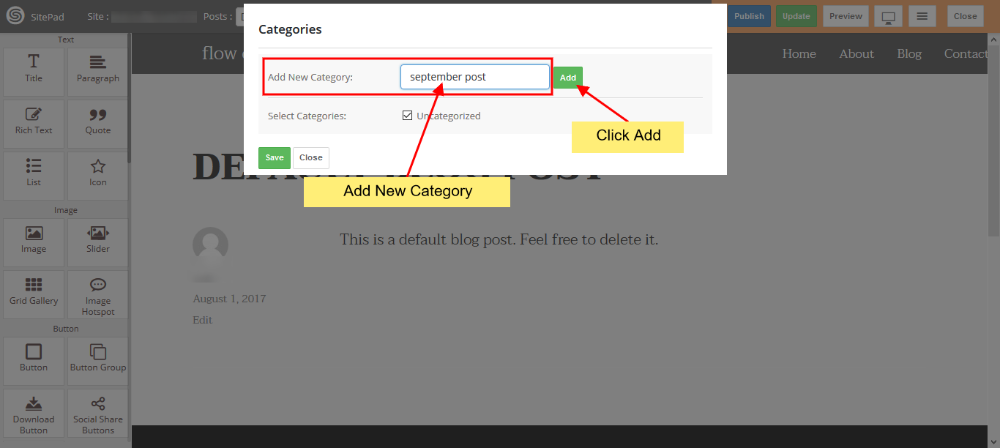
A dialog box will appear in which you can add a New Category as shown in the image below or you can select from different Categories already added.
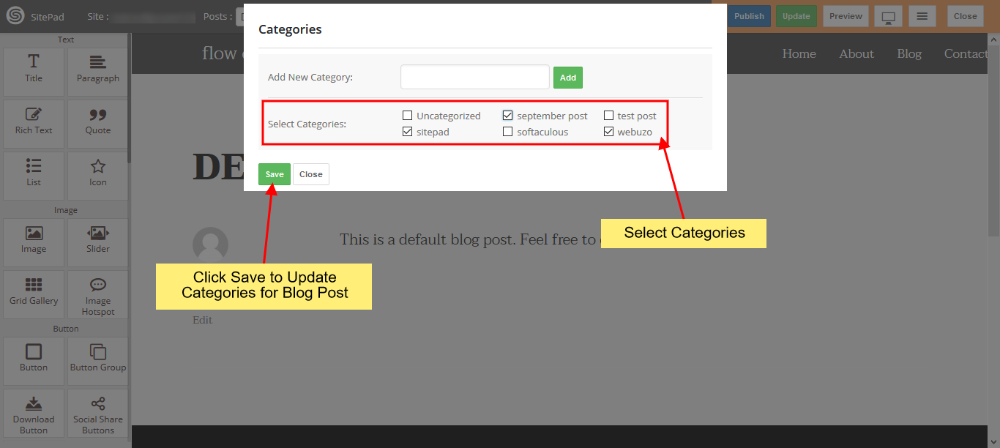
After selecting which Categories you want to assign to your post then click on Save to update the categories for the Post as shown in the image below.
Preview Changes
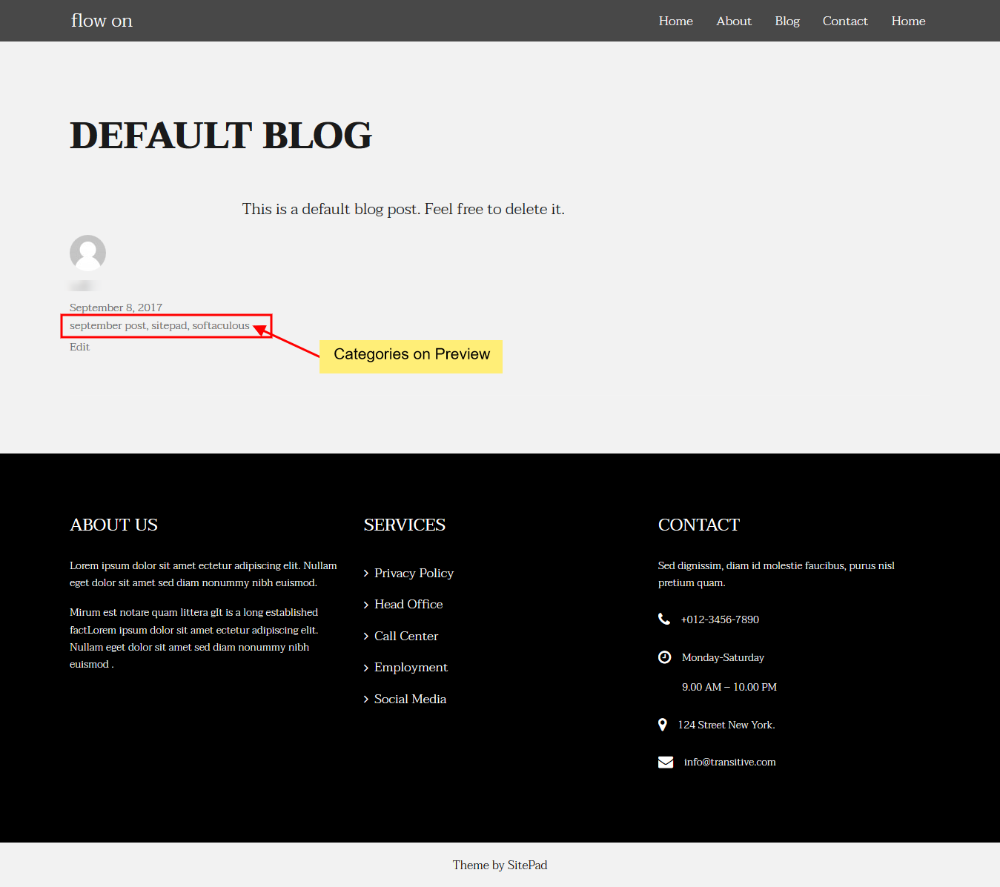
After assigning categories to the post, on preview, your post would look like the image given below:
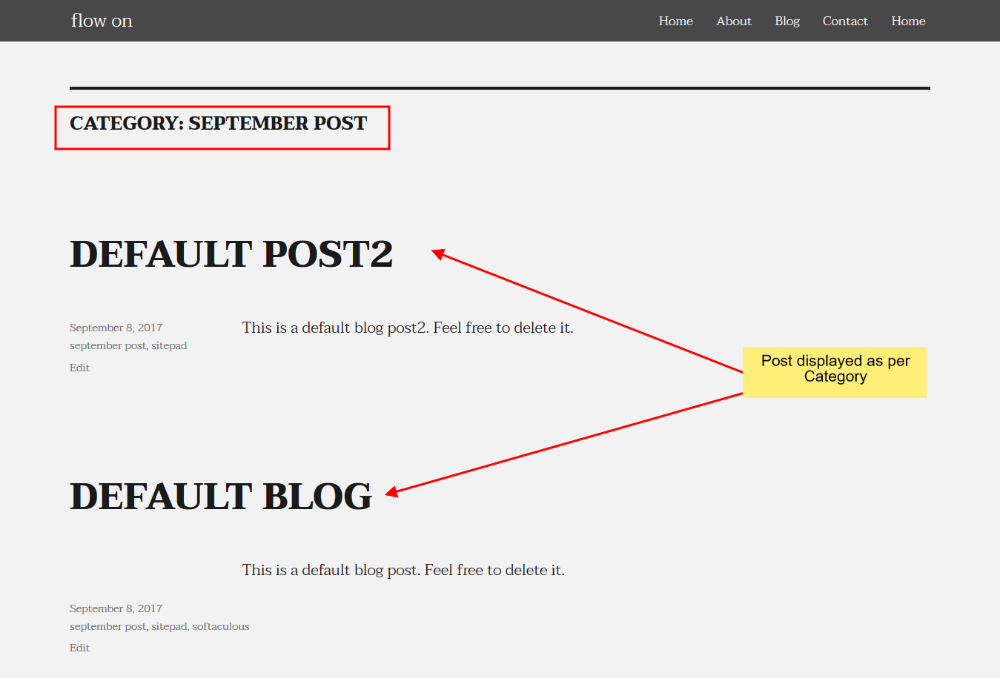
Also if you assign a single category to more than one post and when you click on that category name it will show all the blog post assigned to that category as shown in the image below:
