This Guide will Help you to customize Countdown Timer Widget Settings and Style.
Note: Widget gives you Default Style provided by theme, you can customize as per your needs using this guide.
Drag & Drop Countdown Timer Widget
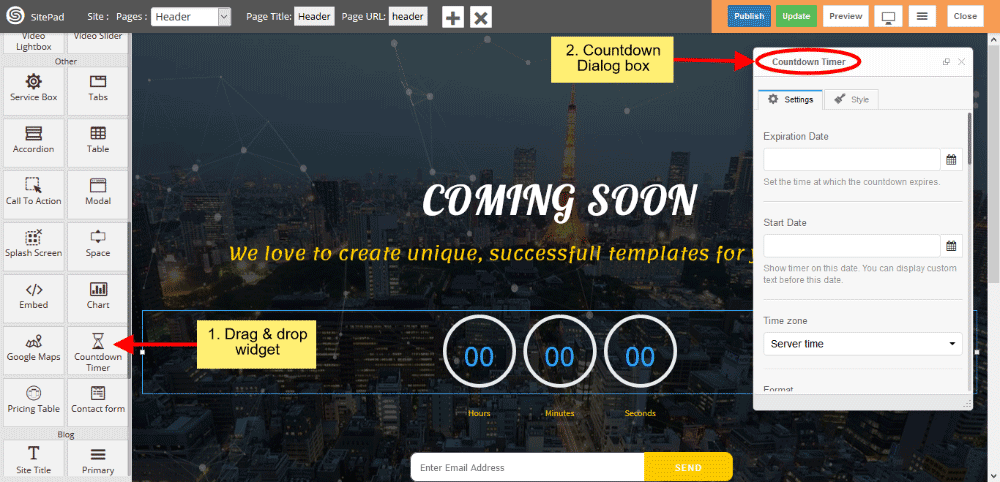
When you Drag and Drop Countdown Timer Widget in a Page, You will see the image shown like below.
Countdown Timer Settings
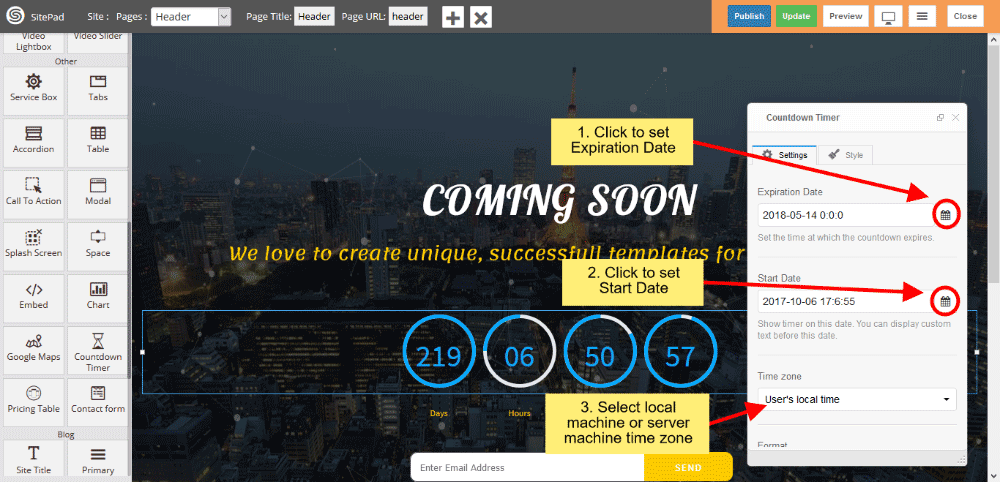
1) Set Expiration Date by clicking on Icon Calendar as per your needs, set the time at which the countdown expires and Set Start Date by clicking on Icon Calendar also.
2) Select the time zone from select option either user’s Local machine or Server time.
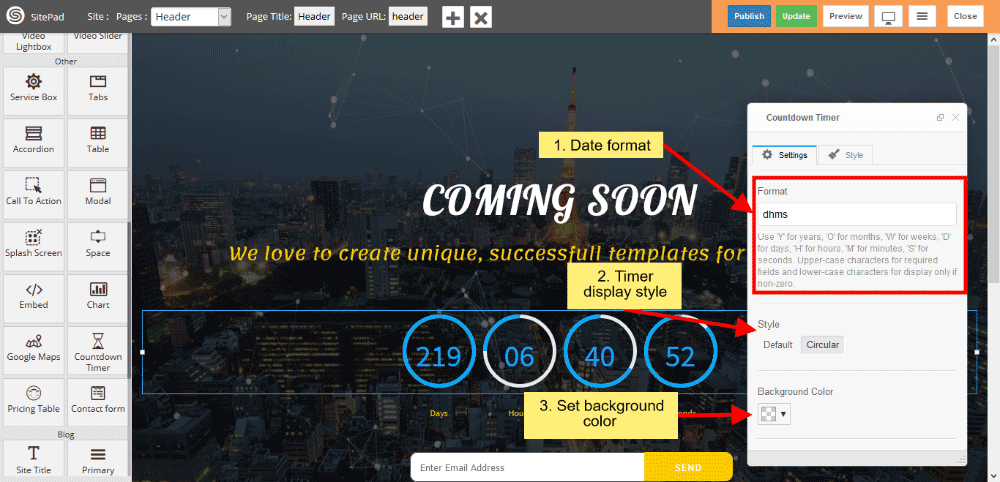
3) Write the Date format for displaying the Timer.
4) Style gives Timer Style such as Default and Circular, by default Circular is enabled.
5) Set the background color for timer blocks.
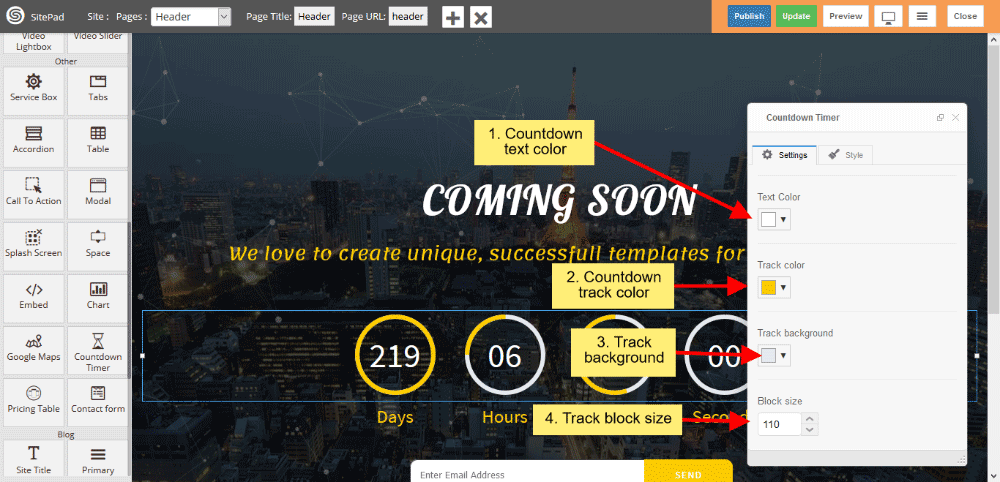
6) Give the color of the Text, Track and
Track Background.
7) Set the Track block size.
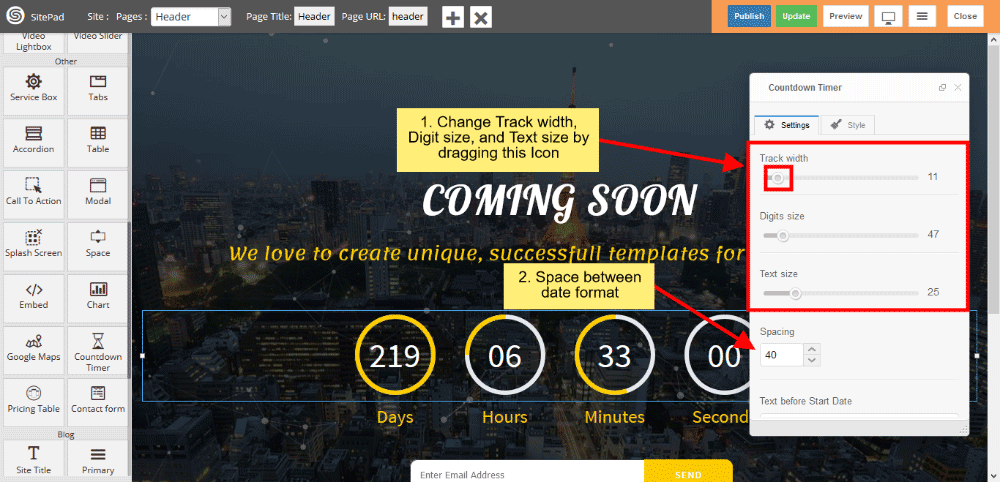
8) Change the Track width, Digit size and Text size by dragging Icon
horizontally.
9) Spacing gives space between the Blocks.
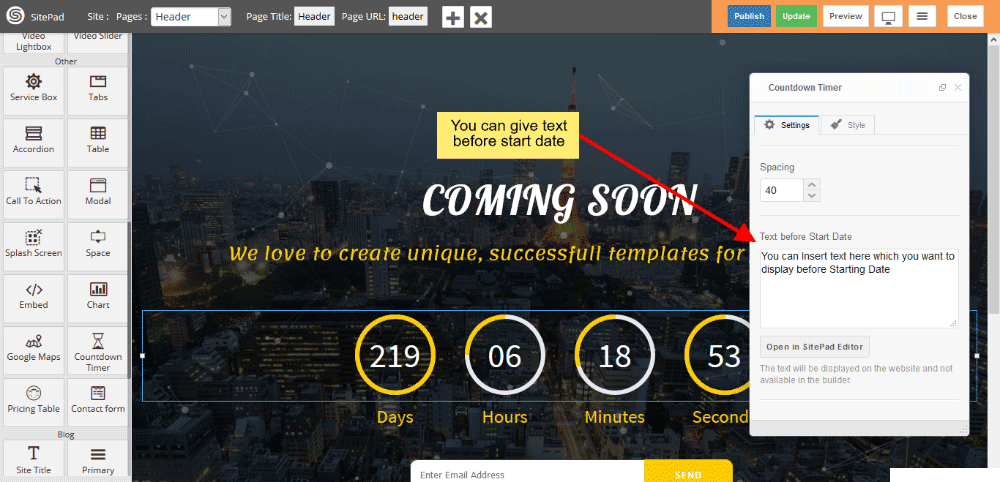
10) You can give Text before starting the date.
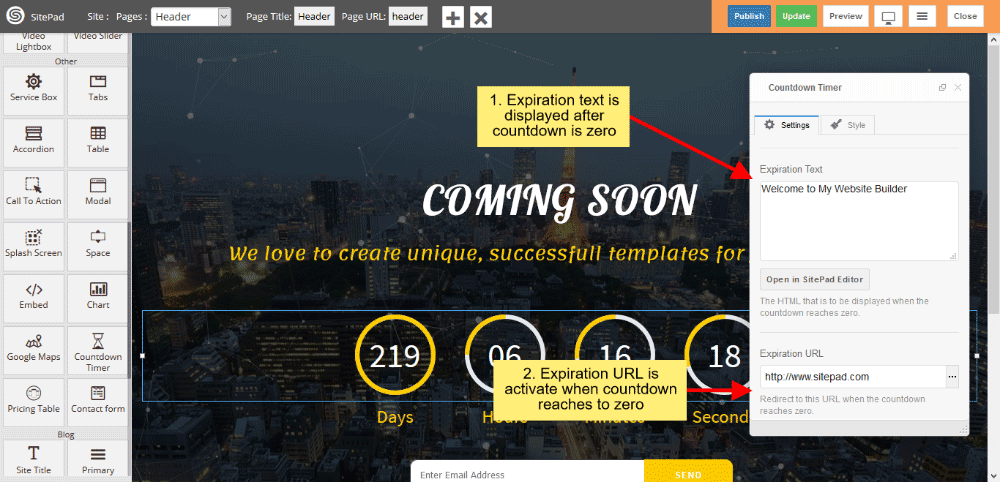
11) Expiration Text is displayed when the countdown reaches
to zero.
12) Expiration Link is activate when the countdown reaches to zero.
